Well friends, I think it's plain to see that I am awful at blogging. I'm glad I tried it out, but I've realized I need a space where I can post little morsels of things I find and am inspired by. Enter Tumblr. It's a perfect fit; acting more as an inspiration board, it will hopefully encourage me to post regular updates. I'll still carry on the essence of this blog over to my tumblr, but it will have more of a "here's what's on my mind right now", short little blurb format. Anyway, go here if you're interested!
Love,
Amanda
Wednesday, April 20, 2011

Saturday, March 5, 2011
simple slippers

I live in the attic room of a cute little green house. The attic space is every small child's dream hideaway, with plenty of little nooks and crannies to play in. I absolutely adore its charm and quirky dimensions. But one thing I do not love is the complete lack of insulation in this little room of mine. You can literally feel the drop in temperature as you make the climb - it's at least 10 degrees colder in my room than the main floor. Usually this would be a good thing because I'm naturally on the warmer side, but it gets pretty cold even for me. I constantly need to be wearing sweats from head to toe, and sometimes it's even necessary for a hat. But somehow I've yet to purchase good wooly socks to keep the feetsies warm. That's where this crochet project comes in. I was inspired by this blog post for my slippers, but honestly I just kind of swung it until it looked right (it took 3 attempts in all). It's a fairly simple and quick project. I'll do my best at relaying my methods to you. I have pretty big+wide feet (yay size 10), so keep in mind how you may need to adjust accordingly.
Yarn: I used Michael's Loops & Threads "Impeccable"
Hook: Size H (You could use G if you want an even tighter weave)
-Chain 10; join with a slip stitch
-row 1: 2 single crochet in each stitch (20 stitches)
-row 2: 2 single crochet in every other stich (30 stitches)
-row 3-7: double crochet in every stitch
-row 8-11: turn; 25 double crochet
-row 12: decrease by 2 stitches at stitch 12 & 13
-row 13-16: double crochet in every stitch
-to finish, fold the end and sew it up. do the same with the hole at the top of the slipper.
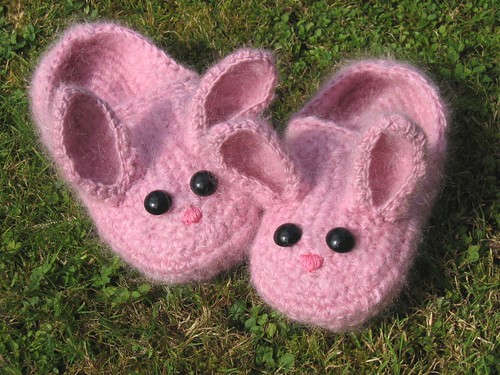
I'll save the little flower embellishment for another post, along with a couple of variations to the slippers. I'm hoping to tackle these ridiculously cute bunny slippers from The Happy Hooker soon.

warmth = happiness
Friday, February 11, 2011
lub-dub
Let's be honest. Valentine's Day has never been a favorite holiday of mine. All the fuss and pressure about professing your love in extravagant ways - spare me, please. But recently I've embraced it with an open mind that it is a day to remind the important people in your life how much you appreciate and love them. I like to do that in small measures throughout the day or week or, if I'm feeling especially giving, throughout the month of February.
One way I've spread the love this Valentine season is through making tiny little door charms for my coworkers' offices. It started out with me making my own version of a design*sponge tutorial - a crocheted heart garland - that I adorned my office with.

I showed a coworker how to make the heart with some spare yarn I brought with me, and figured I might as well make something else with it! And behold, a simple white heart door charm was created.

One way I've spread the love this Valentine season is through making tiny little door charms for my coworkers' offices. It started out with me making my own version of a design*sponge tutorial - a crocheted heart garland - that I adorned my office with.

(please ignore the dingy blue message board)
I showed a coworker how to make the heart with some spare yarn I brought with me, and figured I might as well make something else with it! And behold, a simple white heart door charm was created.

This is the same method as the heart garland tutorial, and to hang it, just chain about 30 and attach to the back of the heart. Next time around, I'll get the fine crochet thread that the tutorial calls for because I have a feeling that tiny heart garlands are even cuter than the ones I made. But hey, this blog is about being green so I used what I had and the result was still pretty darn cute and simple.
Tuesday, January 25, 2011
craft challenge
In between the daily tasks and client care at work (I swear I'm not neglecting my job duties!), I find myself perusing blogs here and there and bookmarking interesting finds. I wanted to share what I found with you today:


Yep, those flowers are made out of shredded cotton t-shirts. So delicate and lovely. I'm a big fan of hydrangeas and chrysanthemums, so this makes me want to drop everything I'm doing and make a dozen of these beauties. But the bad news? Not a single tutorial to be found! The Cotton brand website used to have one, but they took it down. How rude -- what a tease, right? So my challenge, when I'm done with a couple of pending projects, is to find out how to craft these lovelies. And if it's successful, I will post a tutorial and share the wealth!

For real. I am in love.
Monday, January 17, 2011
so fresh and so clean, clean
Friends, I am so ashamed that I have neglected this blog for over a month! A deadly combination of laziness and lack of new projects had me at a standstill. But I am back and with a long list of goals and projects for 2011; I can't wait to share them.
While I regain my bearings, though, I will make a post or two about old projects. First up: homemade laundry soap!

While I regain my bearings, though, I will make a post or two about old projects. First up: homemade laundry soap!

I discovered a recipe for homemade laundry soap a few years ago and haven't given store-bought detergent a second glance since. I L-O-V-E this stuff. Three ingredients. Each load of laundry costs me pennies. Specifically, about 8-10 cents per load. Cuh-razy, right?! Those are numbers I like to see. And if you're worried about if the homemade stuff delivers, don't be! With tried and true ingredients like Borax and Washing Soda, you cannot go wrong. This is a no brainer for me. I get to store my concoction in cute, reusable glass containers and pair it with vintage spoons for measuring - instead of bulky and unappealing plastic bottles. The only thing that might be a deterrent for some is that the grating of the bar soap takes a bit of elbow grease. But turn on your favorite show and in no time you will have a pile of grated soapy goodness.
Homemade Laundry Detergent
2 cups grated Fels-Naptha soap*
1 cup Borax
1 cup Washing soda
2 tbsp for a light load, 3 tbsp for a heavy load.
*One bar yields about 2 cups. You could use other bar soap, but I've always stuck with Fels-Naptha.
Wednesday, December 1, 2010
season's greetings
Happy December, loves. It finally feels like the holiday season now, doesn't it? I've been slowly decorating our little house (and the office) with splashes of Christmas cheer for the past few days. I'll be sure to post some photos of a few holiday crafts and decor soon. In the meantime, check out this video. It's from the company Postcarden, who makes the most delightful greeting cards with a green twist.
I would not mind getting one of these beauties in the mail. Cough cough.
Saturday, November 27, 2010
dirty shirley.
I was first introduced to this delightful drink when I visited a friend in Bellingham and went out to one of her favorite joints. Also called a "red dollar bill," a dirty shirley is basically a shirley temple with spirits. My oh my - this is a fair warning not to literally chug this thing.

1 shot of vodka + 1 shot of grenadine + sprite = fruity deliciousness
I'm slowly working my way into the arms of red wine, but I will always go weak in the knees for a drink with a fruity twist.
Sunday, November 21, 2010
quidditch is for lovers.

So, as any self-respecting human should know, Harry Potter and the Deathly Hallows: Part 1 came out this weekend. And you bet your cornish pixies I was at the midnight showing with the thousands of other awesomely nerdy Potter followers. There were hundreds of Harry/Hermione/Dracos, even a Luna Lovegood and Rita Skeeter here and there, as well as nondescript Death Eaters and Hogwarts students. But the most creative costumes I saw included a female dressed as the Fat Lady (with huge picture frame, head wreath and all), and a pair of teenagers in shiny metallic get-ups. Right away I spotted the gold teen was a Snitch, but my housemates and I were baffled by the silver teen with the antlers. Then Gabrielle guessed that she was Harry's Patronus, a stag. AWESOME. I admire these folks and would not usually hesitate in joining them in full costume attire, but I decided to go the more subdued route. I set out to make some shirts that I would be proud to strut around in, not just at a Potter nerd fest, but any day of the week. I think I can confidently say I accomplished this task.

Supplies:
Acrylic paint + fabric medium*
Sponge stencil brushes
X-acto knife
Freezer paper
Stencil or graphic printout
Shirt
*You can purchase fabric paint as an alternative to the above combination, but the color selection is very limited with fabric paint.
Step 1. Trace your text or design onto freezer paper. Be sure to trace on the matte side. Using an x-acto knife, cut out your design. You now have your stencil.
Step 2. Lay your shirt out on a flat surface, preferably an ironing board. Place your stencil, shiny side down, on your shirt. Carefully iron on your stencil, leaving out the strips for letters like "P" and "R." Since freezer paper typically curls, it is best to wait until the main stencil is ironed down and then position and iron on the little strips second so that you end up with cleaner lines.

Step 3. Mix equal parts of acrylic paint and fabric medium. Then stencil away! Make sure you have either a piece of cardboard or an old magazine in between the front and back of your shirt. If you don't, the paint will most likely seep through to the other side.
I wanted a more vintage and old-school-varsity look for my shirts, so I only applied a light layer of paint. But if you want a more saturated look, you can reapply your paint a few times. But let your paint dry at least halfway before reapplying to protect the seal on your freezer paper.

Step 4. Wait patiently for the paint to dry completely before peeling off the stencil. This is the magical step - I always get so excited for the revealing! Sometimes, pieces of paper are stubborn and don't easily come off. Just be patient and slowly pick away at it; it should come off eventually.

Step 5. Admire your handiwork. And wear it proudly. Like Sam. :)

It might be a good idea to try your shirt on and make a couple of pencil marks or use pins to outline where you want your stencil to be. This way you can be sure you don't accidentally put the design too high or too low on the shirt. I may or may not have run into this problem. :)
And here's my two sentence review of DH: Part 1 - HARRY FREAKIN' POTTER was sooooooo good! Except for the completely unnecessary naked make out sesh, everything about that movie was incredibly well done. :)
Tuesday, November 16, 2010
a beautiful story.
Stop motion is probably one of the greatest artistic ideas...EVER. Especially when creative geniuses take a stab at it. Like this video below.
Beautiful, beautiful piece. I wish I could pull a Mary Poppins and jump into those pages and stay there forever. Maybe one day I'll get enough creative energy to attempt my own mini stop motion feature.
Beautiful, beautiful piece. I wish I could pull a Mary Poppins and jump into those pages and stay there forever. Maybe one day I'll get enough creative energy to attempt my own mini stop motion feature.
Wednesday, October 27, 2010
sushi time

My taste buds are a-changin'. I never would have admitted to liking sushi a few years ago. Seaweed? Eugh. But along with now having new cravings for PB&J all the time (I know - shock, right? I used to HATE jam/jelly), sushi has found its way into my life. And who knew how easy it is to make? It's also way easier on the pocket than buying it prepared. My sushi included carrot, bell pepper, avocado, and sprouts. Mmm mm. Add edamame as a side and mochi for dessert, it is a wonderful and light dinner meal.
See my favorite magazine's website for more details and an ingredient list.
Tuesday, October 26, 2010
Thursday, October 21, 2010
the meatrix
Finally a video about the harsh realities of the meat industry that doesn't look like it's been monopolized by PETA. Although it's a bit cheesy, it's worth watching.

My bottom line: you don't have to be a vegetarian to "save the world." It definitely helps, but if meat is a must for you, be informed about what you're eating, know where your food comes from, who is producing it, and what your money is supporting. We should all be striving for health and nourishment in our diets. Both for our own bodies and for the earth.
Although -- score for the veggie team: Going veg for one year "cancels out" the amount of carbon that two average Americans generate in a year. If you go vegan, it's almost fourfold. I'm just saying.
woodland dreams
This post has nothing to do with being crafty or being green. But I had to share how positively smitten I am over this masterpiece.

What i would give to have dreams in a bed like this. It even has snow falling! Magical, I tell you.

If only it didn't cost over $5,000. Anthropologie, you are such a tease.
Monday, October 11, 2010
ch-ch-ch-chickpea tacos

I have something to confess. I am a vegetarian. And I'm damn proud of it. It's been about a year since I committed to this lifestyle and it's probably the best decision I've ever made. The main reason I made the switch was to help the environment out a little. I know, most people become vegetarians to save the animals - and that is a small part of the equation - but being a veghead is so good for the earth! Did you know that meat production is responsible for 20 percent of greenhouse gases produced each year? It's true. I got a whole pocketful of other veggie trivia that I might bust out when you least expect it.
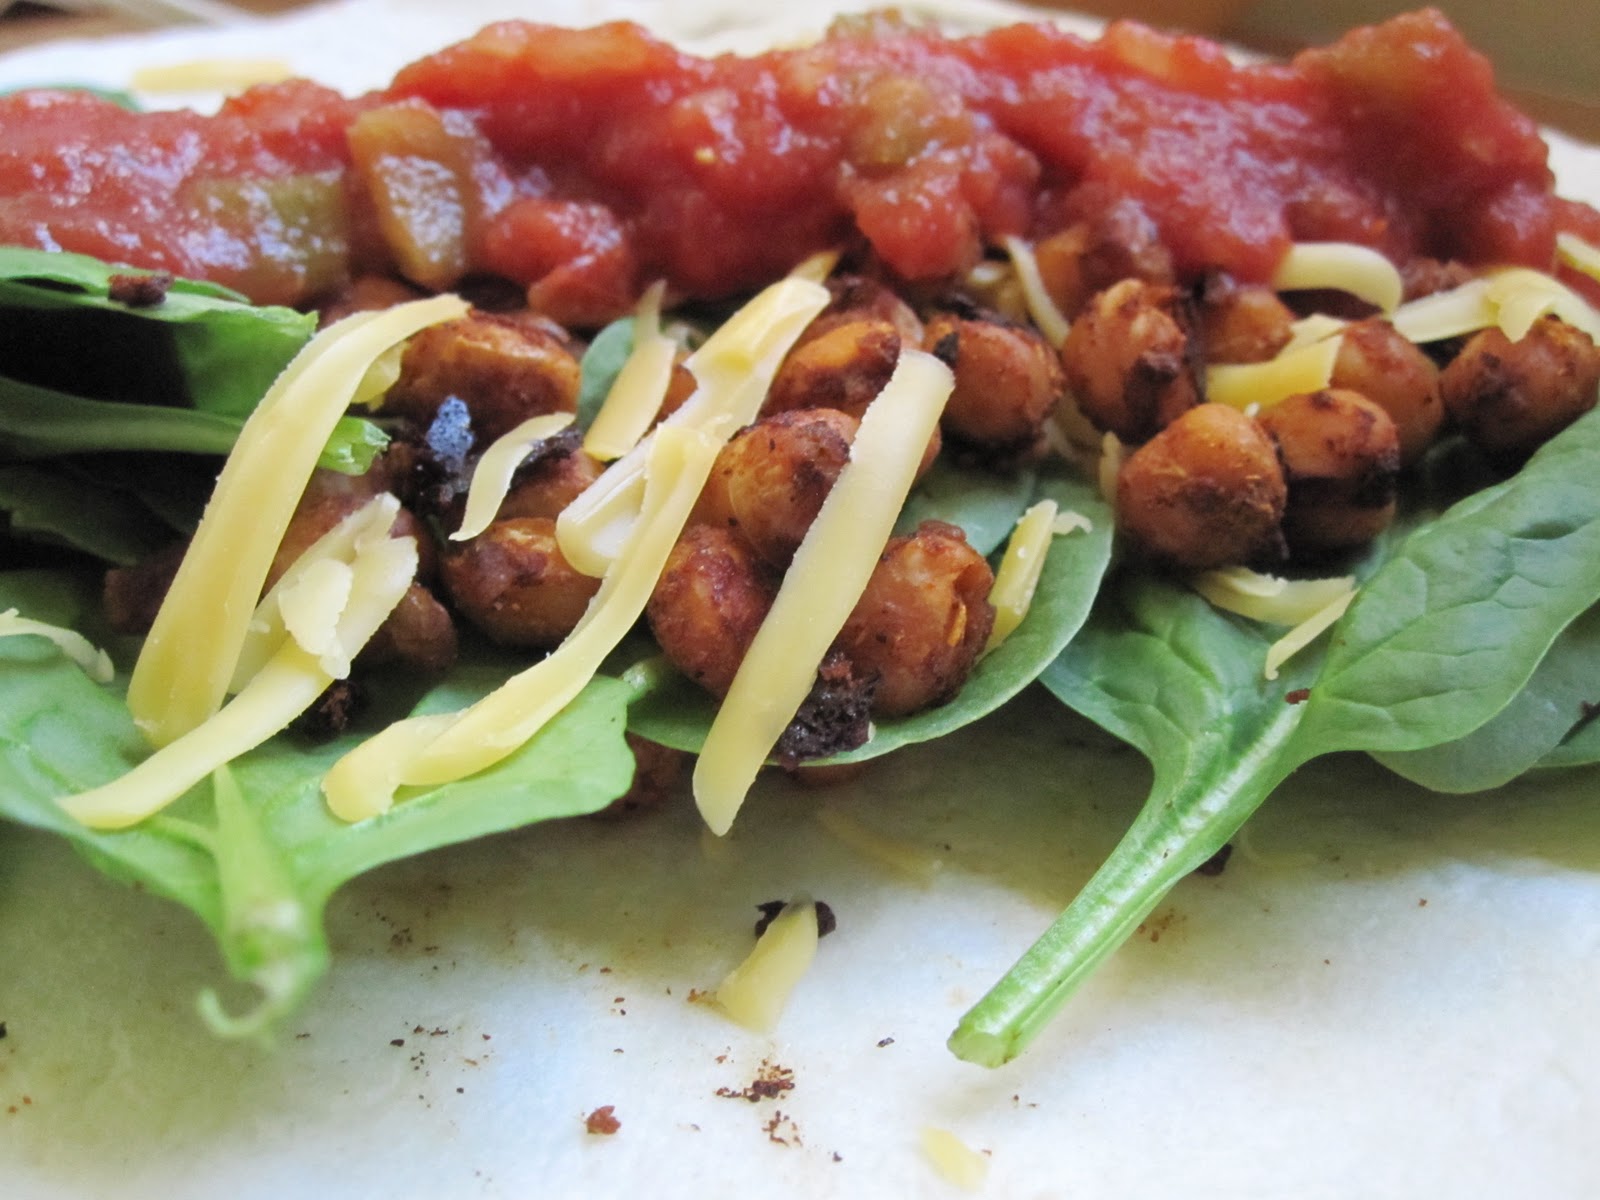
Also, I just feel healthier and it's extremely fun to cook now. I get a chance to spread my creativity to the kitchen and I have enjoyed researching this whole new world of recipes to try out. Like this recipe I found on Happy Herbivore. Chickpea tacos = YUM. It's so easy to make too.
1 15 oz can of chickpeas, drained & rinsed
1 tbsp tamari soy sauce
2 tsp lemon juice
1/2 packet of taco seasoning, or make your own
8 hard taco shells or small tortillas
Taco toppings
Preheat oven to 400 F. Whisk tamari, lemon juice, and taco seasoning in medium bowl. Toss in chickpeas until coated. Place chickpeas on lightly oiled cookie sheet and bake 20-25 minutes. Assemble tacos with chickpeas, lettuce, tomatoes (or salsa), cheese, and enjoy.
Friday, October 1, 2010
scrub-a-dub dub

I don't know about you, but I love when I can complete a project in under 5 minutes. Maybe it's my short attention span or need for instant gratification -- either way it feels good to hold a finished product in your hands. My roommate can crochet blanket after blanket; she spends weeks on them. I just don't have that kind of patience. So I was really happy when I came across this little craft. I've seen ideas for facial scrubbies around Etsy, like this and this, that are just adorable. But hey, I'm all about saving a few pretty pennies and making them myself.
This project will eliminate the need for disposable cotton pads/balls for exfoliating your face or taking off makeup. When they're dirty, just gather them up in a mesh bag and throw them in with your laundry. I'm simply smitten over these little guys. You can make around 10 of these in a span of one Glee episode. Like I said, instant gratification (doubly gratifying if you're watching Glee).
Supplies:
Cotton Yarn (I used Lion Brand)
Size F crochet hook
Plastic yarn needle
Start by making a chain of 6 stitches. Then make a slip stitch into the first chain to form a circle.

First Round: Chain 3 (this will be your turning chain) and make 11 double crochet stitches into the center hole of the circle. Make a slip stitch into the top stitch of the turning chain. You now have a 12 stitch circle.

Second Round: Chain 3 for another turning chain. Then make two double crochet into each stitch. Make a slip stitch. You should now have 24 stitches around.


Wednesday, September 22, 2010
craft: blooming billies
I wish I had all the time in the world to just surf all of the impressive blogs out there. A recent blog I stumbled upon, domestifluff, had a clever tutorial on how to make pom pom flowers. This craft made me incredibly giddy because of my recent infatuation with lucy balls and billy balls.


I haven't been able to find either in stores to purchase. Admittedly, I haven't overexerted myself in looking for them, but that's besides the point. Domestifluff's craft has solved my problem and I couldn't wait to try it out. Her method suits lucy ball-sized poms, so I modified her method a little to make my desired billy ball-sized poms. Take a look at my results (and a mini step-by-step tutorial).
Tools:
Yarn (I found that acrylic yarn gives the best effect)
Scissors
Floral wire + or twigs

Wrap yellow yarn around your finger about 50 times semi-loosely.

Slide ball off finger and cut a piece of yarn roughly 4 inches long.

Place the yarn ball on top of the yarn string. Tie a tight knot with the string.

With scissors, cut the tops of all the loops.

You now have a scraggly, almost dahlia-shaped, pom pom.
(I considered stopping at this step and making a brooch.)

Shave off the excess yarn by taking your scissors and cutting the
yarn in a circular direction until you are happy with the results.
(Yes, that is a Nancy Drew book underneath the fluff.)

Take your floral wire or twig, and stick your pom on top.
If you want it to be more secure, you could use hot glue.
And voila! Happy little billy balls. I think they look pretty darn-tootin close to the real thing, don't you? Thank you SO much, domestifluff, for your inspiration! I'll definitely be trying out more variations soon.

Sunday, September 19, 2010
craft: billy ball preview
Here's a little sneak peek for a recent craft I've been working on. More pictures and a tutorial to come!

PS - Isn't that piano gorgeous? A lovely treat that came with the new house we just moved into. I wish I knew how to play the piano, but it's definitely encouraging me to learn!
alias
After years of pining over all of the wonderfully creative and well-done blogs all over the interweb, I have finally felt ready for the challenge of starting up my own. So here I am!
I want to take a few moments to introduce this little blog of mine to the world. You might be wondering where I got the adorably clever name "kelly greenthumb" because, in fact, my name is Amanda. The name encompasses everything I aspire to be: a steward for our precious earth and a crafting, do-it-yourself guru. I like to think of KG as a love child between Captain Planet and Martha Stewart. That's a weird picture I painted, but you know what I mean. And well, it's a nice coincidence that Kelly is my middle name and that kelly green was my absolute favorite color in high school. Thus my alias was born.
I hope to keep this space updated often with various posts about recipes, crafts, tips, adventures, inspirations, and life lessons.
Thanks for taking the time to peruse and partake on this journey with me.
Subscribe to:
Posts (Atom)